How to Build a Wood Table — DIY Oak Table [Easy] Woodworking

I’m passionate about tables but must admit that I’m not fond of the term dining table. A dining table was the table in the fancy room of the house that I grew up in. The one we could never eat at unless company was over. The one relegated to card games and jigsaw puzzles and homework on occasion.
To me, dinner table is a more apt description. In a lot of ways the dinner table is at the heart of our home now. It’s where we eat together, though less and less frequently these days, unfortunately. It’s where we celebrate birthdays and forge through the traumas that everyday life can throw at us.
In that way, our dinner table is the foundation of our home and of our family. I think it’s true for a lot of other families as well, and because of that, the table we choose to build has the potential to contribute to the end user in a lot of different ways.
I tend to be fairly agnostic about most aspects of woodworking, whether it’s the tools you use, the methods in which you work, the style you choose to build in, or the space that you call a shop. But here’s where I draw the line, because there are some important things to get right, things that can make a big difference in your life.
More than anything else, making a dinner or kitchen table is the place and time to forget about impressing neighbors, or the boss, or the extended family you see once a year that always seems to have an opinion about the way you are raising your children or how much you should be getting paid.
I know. Impressing all of those people with the results of your efforts, to explain and validate all of those hours you spend in the shop doing who knows what, is a tempting thing.
This table is not for them. It is for you. For your family, whether that means just you and a roommate in a small apartment, or a growing family in an overstuffed, undersized house.
Amidst all of that change and uncertainty, here is an anchor, a refuge amidst the storms of life that can rage around you. Yes, you can make do with a folding table, or a box on the floor in front of the TV. But make a table. Don’t start with a design or a particular style, but with a feeling, a thought of what that foundation needs to offer you.
My particular answer to that question may not be — and probably won’t be — yours. But start there and don’t stop until you find an idea that answers the question. Then let that idea begin to grow into a vision that leads to a design.
And if you’re building for someone else, this is the time to listen, to get past the circled pictures in the Pottery Barn® catalog, and to get to the heart of what they’re really after.


We had a Shaker-style trestle table that served us well for many years, but although it did a good job of supporting items 30 in. off the floor, it didn’t contribute a lot more to the conversation.
The top was too thin, and it had a folding leaf that I had permanently secured in the up position. It was also the only oddball in a room otherwise dominated by Arts and Crafts.
Not that the style was overly important, but I had slowly begun to establish a sense of place in the room with each piece that I had made, and the dinner table was the only holdout from a previous time.
So a lot of what I envisioned for a new dinner table was similar to the furniture that was already filling the room. A sense of mass and permanence, a sense of history. Maybe not history exactly, but a resonance of the past, a warm comfort and familiarity.
An affinity for weathering abuse. The strength of a stone foundation or a timber-frame barn. More specifically, the idea began to manifest itself in certain features. A thick top, stout legs, the tenacity of white oak, heavy chamfers.
That trail led to the idea of a hayrake table, a product of the English Arts and Crafts movement that predated and heavily influenced the American movement. My table is based loosely on a library table by Sidney Barnsley, one of the pioneers of English Arts and Crafts design.
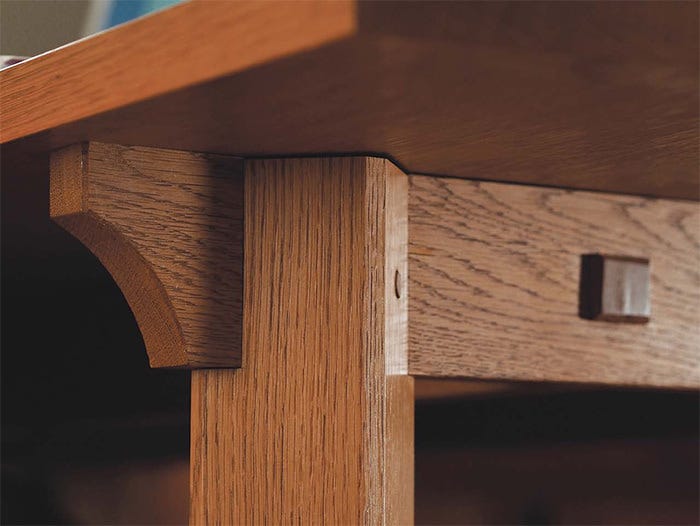
Its solid base resembles a timber-frame structure more than a piece of furniture. The parts are oversize, with solid square legs, a heavily chamfered stretcher, and a thick top. The joinery is larger in scale as well, with proud tenons and pins. Draw-bore pegs pull everything together and add to its girded look.
I wouldn’t call it rustic or primitive in style, though those descriptions aren’t that far off. Solid and basic maybe, but with an architectural order to it as well, which is highlighted by the lower stretcher, its curved ends resembling a traditional hayrake and giving the table its name.
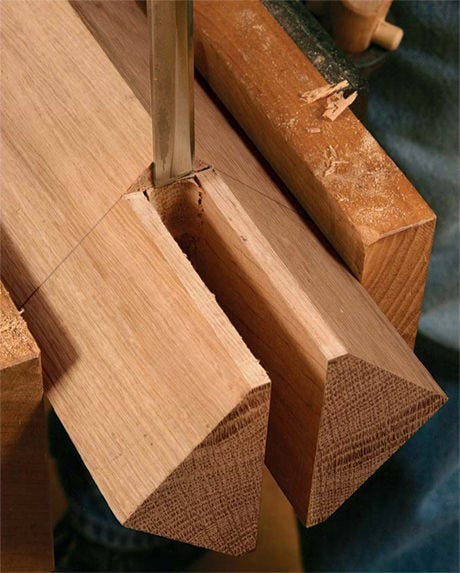
Bridle Joint on The Bias
The first step is to create a flat on either side of the slot. You can cut the flats with a handsaw or tilt your bandsaw to 45° and make quick work of it (1).

Then cut the bottom with a backsaw (2).

To make the slot, head back to the bandsaw, cut one cheek, and then rotate the stock to cut the second cheek (3).

Drill out the waste with a Forstner bit and chop the base line square (4). From here, treat it just as you would a normal bridle joint.

The Hayrake Stretcher
The end cap is the highlight of the lower stretcher. To get to it, the first step is to connect the angled arms (or Y-stretchers) to the center stretcher. Cut a 45° miter on one end of each arm, and then use a miter gauge and dado blade to cut the tenon cheeks (1).

Next cut the shoulder on the inside of the tenon at the bandsaw (2).

Mortise the center stretcher and angle the outside end of the mortise using a guide block clamped to the stretcher (3). While you’re at it, mortise a short cutoff in the same way to use as a setup block for sizing the cap.

The end cap starts as a wide blank. Miter the ends and cut the tenon cheeks in the same way as the arms. Insert the arms into the setup block to transfer the mortise locations onto the end-cap blank (4).

Cut the tenon ends and fit the end-cap blank into the arm assembly. Use a beam compass or trammel points to mark the curve of the end cap (5).

After mortising the end cap for the tenon on the end of the center stretcher, cut out the curve (6).

Assemble the arms to the center stretcher and set the end cap on the assembly to locate the curved tenon shoulders (7).

Cut the tenon, starting with a square shoulder, and then use a chisel to pare to the curved knife line. Sneak up on the fit until the joint fully seats (8). Don’t sweat it if the fit isn’t perfect — this style forgives a gap here and there.


Pull It All Together
Draw-bore pins do away with what would be a nightmare clamping situation. Drill through the mortise and transfer the center of the hole onto the tenon with a brad-point bit (1).

Then drill a hole through the tenon, offsetting it 1/32 in. toward the shoulder. This offset will pull the joint together tightly as the peg is driven in (2).

Rout a chamfer along the parts, stopping short of the intersections, and fare that portion with a chisel. Fasten the top to the base with wooden buttons (3).


Another distinctive feature of the table, though it may not be apparent at first, is the orientation of the legs. They are at 45° instead of parallel to the edges of the tabletop. This adds an extra step to cutting the bridle joint at the top of the legs but simplifies hayrake stretcher joinery, which is well worth the trade-off.
